

how to clean keurig 2.0
Cleaning your best Keurig coffee maker can seem quite daunting because of the smaller parts involved, but we're here to help get you through it.
In this guide, we will cover cleaning and descaling in depth. This will help keep your Keurig operating correctly and make sure it is free from mineral build up – so that it runs smoothly day after day.
There are three major steps when cleaning any Keurig model, including removable parts, internal parts, and descaling. You probably already have the equipment needed, so let's get started!
If you're machine isn't running well despite cleaning, our Keurig troubleshooting guide might be able to help you diagnose and fix common problems.
How To Descale Your Keurig
Brewer descaling is a process which removes mineral buildup, typically lime scale. You've probably seen it before – a hard, white substance that often builds up in coffee makers.
Keurig recommends that you descale your brewer every 3-6 months.
Tap water that contains high levels of minerals is known as 'hard water.' If your household water supply is hard water, mineral buildup can happen quite rapidly.
Over time, this buildup can clog lines or break off in small pieces. This is often the reason why the water reservoir and feeding line fail to operate correctly in a Keurig brewer.
Keurig Descaling Instructions
You don't have to clean your Keurig before descaling. However, it is probably a good idea – it will help the descaling process and remove as much buildup as possible throughout the entire machine.
Time To Complete: 35 mins
What You Need
- White vinegar (Optional: Keurig Descaling Solution)
- Water
- Keurig 2.0 maintenance accessory (if you have a 2.0 machine)
Instructions
- Reassemble your Keurig as if you were ready to brew a fresh cup of coffee. Ensure that all pieces are seated properly. Don't forget that water reservoir O-ring!
- Fill the water reservoir to about halfway with white vinegar.
- Run a brewing cycle to make "hot vinegar."
- Dispose of the hot vinegar when the cycle completes.
- Continue brewing and discarding the vinegar until the reservoir is empty.
- Refill the reservoir with water.
- Brew hot water and discard until the reservoir is empty. This is to remove all the vinegar from the system, so you won't get vinegar-flavored coffee.
- Now you're ready to brew a fresh cup of coffee in your descaled Keurig!
Related | Keurig Descale Light Stays On
How To Descale Keurig 2.0
With this machine, you will need the Keurig maintenance accessory to perform a cleansing brew. If you didn't receive one with your Keurig 2.0, you will have to purchase one separately or contact Keurig to see if they will ship one to you.
Some people have a reusable K-Cup that is dedicated to cleaning.
Keurig 2.0 Needle Cleaning Tool | Editor Recommended
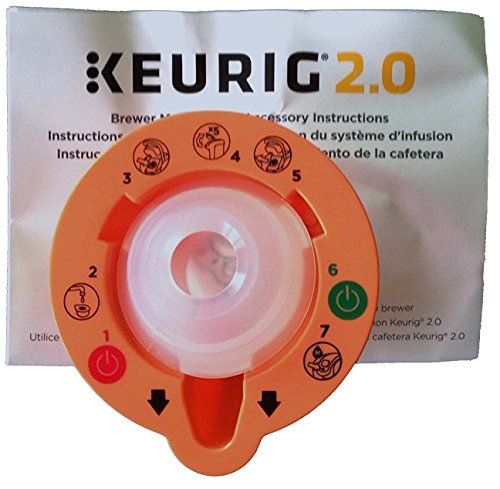
Top Features
- Keurig 2. 0 Brewer maintenance accessory cleaning tool is for Keurig 2. 0 machines (will not work with other Keurig machines)
- Will not work with other brands of Coffee makers.
- Cleaning tool will only help with Cleaning clogged needles. Will not help with other Coffee maker issues.
- Includes instruction manual
- Genuine Keurig Product
Vinegar vs Descaling Solution
You can purchase liquid descaling solutions for coffee machines. The main ingredient is usually citric acid, whereas white vinegar is about 3% acetic acid and 97% water.
There are a variety of descaling solutions available on the market. Keurig Descaling Solution is highly recommended, but some other brands can be quite harsh compared to vinegar, and ruin the internal workings of your coffee maker.
If you plan on using a descaling solution, check the box for detailed directions. Make sure that any commercial descaling solution you purchase is safe to use in Keurig machines. The descaling process should be the same, but you would use the solution in place of vinegar.
Keurig Descaling Solution
While we recommend using plain white vinegar, you may be curious about using the descaling solution offered by Keurig.
There are a few things you need to know about it.
- The solution is citric acid based and it may leave a chemical taste in your Keurig – even after multiple cleansing brews.
- It may not be as effective as vinegar.
- It's expensive compared to vinegar.
If you feel the vinegar treatment isn't working for you, you may want to give this a shot. Who knows, it just might fix a stubbornly clogged Keurig.
How To Take Apart A Keurig
- Unplug the machine. Never clean or take apart your Keurig while it's plugged in. Make sure you are working in a well-lit room that is free of clutter. Safety first!
- Remove the lid and water reservoir. You will notice the instructions under the lid as to how to clean the lid with a damp cloth. When removing the water reservoir, make sure you don't misplace the O-ring, otherwise your Keurig will leak the next time you try to use it.
- Remove the k-cup holder and funnel. Be careful of the sharp needle(s) that puncture the Keurig cups.
- Remove the drip tray and drip tray cover if applicable.
How To Clean A Keurig In 5 Steps
You Will Need
- Toothbrush
- Paper clip
- Drinking straw
- Kitchen towel or microfiber cloth
- All-purpose cleaner
- Paper towel
Instructions
Unplug your Keurig before cleaning.
Step 1 – Clean K-Cup Area With Toothbrush

Use a toothbrush or cue-tip to remove any coffee grounds in and around the K-Cup holder space.
Step 2 – Clean K-Cup Area With Paper Clip

Using a paper clip, gently push inside the holes that pierce the K-Cup. These holes get clogged easily with coffee particles and built up minerals. You may have to wiggle the paper clip a little inside the holes. If a paper clip does not fit, search out something a little thinner.
Note: The water line may get clogged at this point during the descaling process, so it's important to be aware of it. If that happens, simply wiggle the paper clip inside, put the machine back together, and finish the descaling process.
Don't worry about breaking anything inside the holes, they are simply water lines with no working parts inside.
You can also try turning the Keurig machine upside down and giving it a "gentle tap" on the bottom to help dislodge anything that may be stuck inside.
Step 3 – Clean Water Line With A Straw
Locate the water line spout and connect the straw to it. You may have to use your fingers to help make a seal.
Blow air through the straw to help dislodge any debris inside the water line. You will have to blow extremely hard. If you don't have the ability to do this, don't worry about this step – it's not the most important phase and you can move ahead with step 4.
Step 4 – Clean With All-Purpose Cleaner
Use a microfiber cloth and all-purpose cleaner to clean the outside of the machine. We recommend spraying cleaner on to the cloth instead of directly onto the Keurig. This will help prevent the cleaner from getting into any unwanted areas.
Alternatively, you can use soapy water to clean, and rinse using a damp cloth. Some areas may need a bit of elbow grease to get the stubborn grime off. Take your time and work on getting things as pristine as possible.
Step 5 – Clean Water Reservoir & Mesh
Remove the water reservoir and empty it. Remove the water filter if your Keurig has one. Turn your tap onto full stream and allow the water to run over the mesh filter inside. This will help dislodge any debris.
White scaling can appear, especially around the reservoir area. This can be cleaned using white vinegar. We recommend using a paper towel that is dampened with vinegar to wipe the area.
You may have to soak the area and let the vinegar penetrate for a minute before wiping with a damp cloth and water. Again, a little elbow grease may be required until it all disappears.
Can I Put My Keurig Parts In The Dishwasher?
Most of these items are dishwasher safe, but we recommend adding the items (not the entire machine) to a sink full of warm soapy water and letting them soak for 10-15 minutes before rinsing and drying with a towel.
Dishwashers can be harsh on plastic items. We get a lot of complaints about the plastic of the water reservoirs turning cloudy or warping. The culprit always seems to be dishwashers and hot water.
You should never scrub the reservoir – a gentle wipe with a soft cloth will do.
SEE ALSO: How To Drain A Keurig
Tips To Keep Your Keurig Clean
Tip #1 – Don't Leave Water Sitting
Don't leave water sitting in your water reservoir for more than a couple days. Mineral deposits will build up as the water evaporates and you will need to spend more time cleaning and descaling next time you want to use it.
Depending on a variety of factors, mold could also start to develop inside your coffee maker, which could make you sick. We wrote about this in our article Mold in Coffee Maker.
Tip #2 – Use Filtered Tap Water
As mentioned above, water straight from the tap can be "hard water," containing high amounts of natural minerals. Not only can this affect your coffee machine, it can also affect the final taste of your coffee.
Filtered water is purified and lacks minerals, meaning you'll have to descale and clean much less often.
Keurig recommends using filtered or bottled water to prevent excess mineral buildup and produce a better-quality brew.
Some people argue that using filtered water takes away some of the subtle flavors they enjoy in their coffee – but this is a matter of personal taste.
We recommend that you use a simple water filtration pitcher such as the Brita 10-cup Stream Filter, if your Keurig model doesn't have one, to help remove unwanted chemicals and tastes from your tap water. This will give you better tasting coffee.
Tip #3 – Clean After Sticky Brews
If you make sticky drinks like hot chocolate, caramel apple cider or sugar cookie coffee, be sure to run a cycle of hot water immediately afterwards. This is known as a 'cleansing brew.'
The problem with sticky drinks is that sugar crystallizes and clogs the system, much like minerals do. Plus, you might invite unwanted pests if your Keurig is a sweet, sugary mess.
The cleanup is compounded if you are using reusable K-Cups, since you will need to clean that unit as well.
That's all there is to cleaning your Keurig! After you have cleaned and descaled for the first time, the second time will feel easier and go much more smoothly.

how to clean keurig 2.0
Source: https://www.kitchensanity.com/coffee/how-to-clean-a-keurig/
Posted by: trujilloanswert.blogspot.com
0 Response to "how to clean keurig 2.0"
Post a Comment